![]()
![]()
See the Desktop File Incinerator pane on the right side of the Home page.
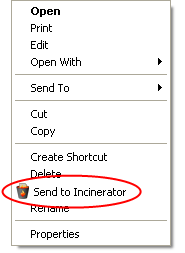
With the Desktop File Incinerator enabled, the ability to permanently delete selected files and folders is integrated into the Windows operating system. Simply select the files or folders and then click Send to Incinerator from the Windows right-click menu to securely delete the data.
A file deleted through Windows is not completely erased; someone using easily available tools can recover it and view its contents. For confidential data you have deleted, use the File Incinerator to completely erase data.
To enable the feature, click Enable. Once enabled:
The Desktop File Incinerator is integrated with Windows and an Incinerator icon displays on your desktop. See Using the Desktop File Incinerator for detailed instruction on using the tool in Windows.
The Enable button is replaced with a Configure button that allows you to change various settings for the Incinerator; see Configure Desktop File Incinerator below.
To disable the feature, click the arrow on the Configure button and then click Disable Incinerator from the drop-down menu.
To configure the Incinerator, click Configure. The iolo Incinerator window opens.
The four check boxes control how the Incinerator is integrated into Windows.
When the Add "Send to Incinerator" to right-click menu check box is selected, a "Send to Incinerator" menu option is added to your Windows right-click menu. Click to view an example.
When the Add “Incinerate now” to right-click menu check box is selected, an “Incinerate now” menu option is added to your Windows right-click menu. Select this option to incinerate files and folders immediately, without sending them to the Incinerator.
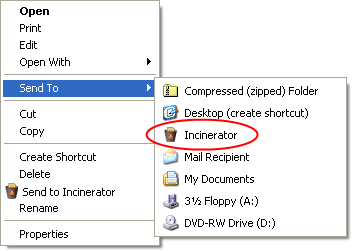
When the Add Incinerator to "Send to..." menu check box is selected, "Incinerator" is a menu option in the "Send To" category of your Windows right-click menu. Click to view an example.
When the Add “Incinerate Recycle Bin” to Recycle Bin menu check box is selected, an “Incinerate Recycle Bin” menu option is added to your Recycle Bin right-click menu. Select this option to incinerate the contents of the Recycle Bin.
The radio button options allow you to choose an overwrite method. The Incinerator erases data by overwriting it with random characters: the higher the number of overwrites, the higher the security (and the more time the process takes).
Choose from one of the following two methods:
Use DOD 5220.22-M compliant technique (recommended). Select this option to generate a pattern that is compliant with the U.S. Department of Defense's standards for erasing data. This method uses an alternating cycle of random characters.
Custom. Select this option to generate your own pattern of overwrite characters. For the custom method, you will set two settings:
Specify the number of times the Incinerator overwrites data in the Number of overwrite passes field. You can enter from 1 to 100. A higher number of overwrite passes increases security, but takes more time to complete. Help me choose.
Select one of the following pattern types:
Use a randomly generated pattern. Have System Mechanic generate a random pattern.
Use a custom pattern. To designate your own pattern, select this option and type the characters in the field.
To view what items are currently in the Incinerator, click the arrow on the Configure button and then click View files within Incinerator from the drop-down menu. A standard Windows Explorer window opens, displaying the Incinerator's contents.
You can also view Incinerator contents through Windows Explorer.
The Incinerator works similarly to your Recycle Bin; you can drag files and folders to the Incinerator desktop icon and you can view the Incinerator's contents through Windows Explorer. DriveScrubber does not need to be open to use this feature.
Refer to Using the Desktop File Incinerator for detailed instruction.